- Gardening Methods
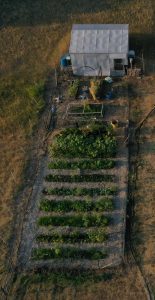
 Over time I have explored different gardening methods. Ruth Stout and her no till method, Larry Hall and his Rain Gutter Gardening System and my favorite Eliot Coleman winter gardening. And of course, there is always Monty Don. In the beginning… I had moved my garden to a new spot and was building… Read more: Gardening Methods
 - Peony
 The History The peony is named after Paeon (also spelled Paean), who was a student of Asclepius, the Greek god of medicine and healing. One version of the story goes that Paeon, known as the healer of the gods, used a peony to treat a wound for Zeus. When Asclepius became murderously jealous… Read more: Peony
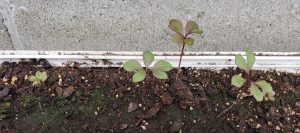
 - Peonies From SeedFall 2020 Peonies are one of my favorite flowers. Like most flowers there is such a variety of color, number of petals and blooming time to explore. This year I am working on moving our garden more towards bushes and easy care – meaning less weeding. What better plant to experiment with than… Read more: Peonies From Seed
- Oh Montana!Our Nest is located on the edge of the bluff overlooking the Jocko Valley and The Dancer. One wrong step off the deck will take you – very fast – to the Jocko River. This image is one of my favorite Moments in Time. We have usually have one, maybe two rainbows at… Read more: Oh Montana!
- Alternatives to RGGSiRoboDude on YouTube has a great video series on his Modified Rain Gutter Gardening system. I was impressed with his organization skills and ideas. I have tried Larry Hall’s Rain Gutter Gardening and loved it, but hated the mosquitoes. There had to be a better way. From my research on the internet, I am… Read more: Alternatives to RGGS
- Plants – Root RequirementsRain gutter gardening is putting plants in a container. It is simple, strawberries do not require as much root room as a tomato plant. But before we start talking about the size of pots we need, we need to figure out what we want to harvest. Gardening is a joy I wish to… Read more: Plants – Root Requirements
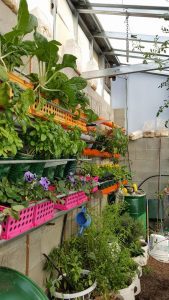
- 3″ Rain Gutter GardeningThe wall of green in the greenhouse is made of 3″ pvc pipe and recycled milk and juice bottles. Is it amazing how pretty recycled containers can be when there is a pattern involved! Spacing was set to the width of the bottles used. 7″ gave me enough space to have the bottles… Read more: 3″ Rain Gutter Gardening
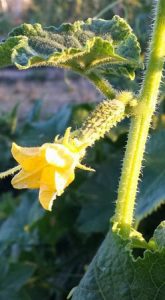
- Pollination – SquashCucumbers, squash, pumpkins…. they all pollinate the same. Pollination by hand should be done first thing in the morning. Female flowers have a potential cucumber or squash, males do not. Pollination can be done several ways. Use a Q-tip or a small brush and take the pollen from the male flower and… Read more: Pollination – Squash
- Companion PlantingOne of the benefits of companion planting is luring the bees and pollinators into the garden. I was amazed this year (2015) at how many people are self-pollinating their plants. Yes, I have tried the method to experiment. But I would rather plant edible flowers in with the veggies, my garden looks… Read more: Companion Planting

Sharing Life
For a deeper dive into our world, explore the dedicated sections on greenhouses, projects, and photography. Each area offers a unique glimpse into our journey, blending nature's beauty with our creative endeavors. Whether you're seeking inspiration for your own garden, interested in the intricacies of greenhouse cultivation, or simply wish to enjoy the visual storytelling of our photography, these sections await to enrich your experience and spark your imagination. We do not claim to be experts, we are sharing our journey as well as ideas that have worked (or not!) for us.
